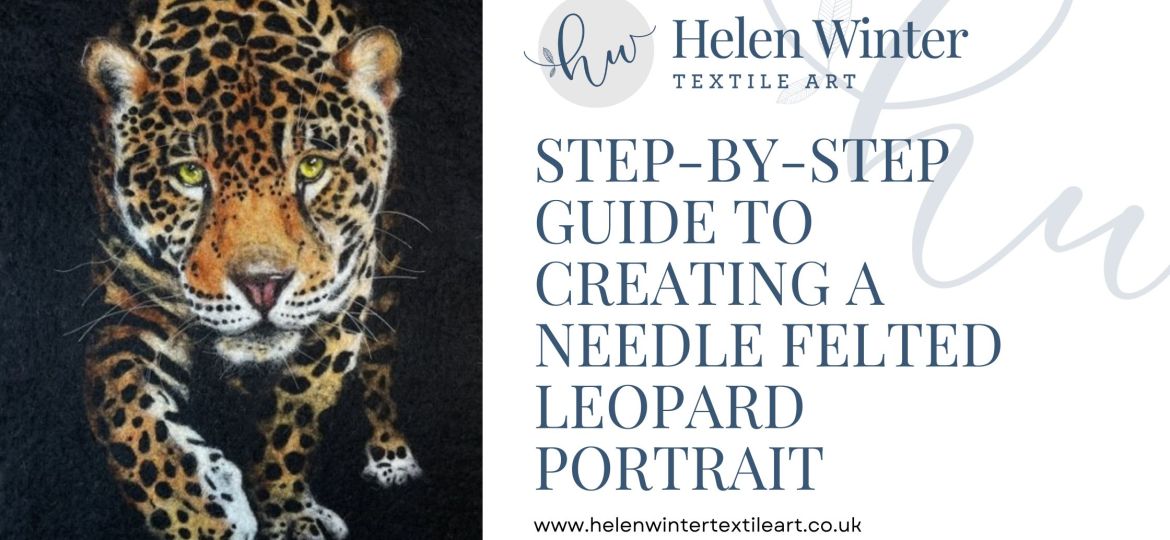
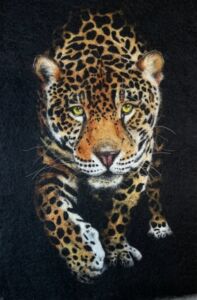
Immerse yourself in the enchanting world of needle felting as we embark on the step-by-step journey to create a captivating needle felted leopard portrait. From selecting the finest wools and materials to meticulously crafting the intricate details, this guide is your key to bringing a lifelike leopard to life through the art of needle felting. Dive into the creative process, focus on the expressive eyes, shape the nose with depth and dimension, and gradually build up the facial features and fur texture. Let this guide be your companion in the rewarding craft of needle felting, where creativity flourishes, and the joy of bringing animals to life knows no bounds.
Introduction to Creating a Needle Felted Leopard Portrait
Needle felting is a versatile and popular craft that allows you to shape and manipulate wool using a special barbed needle, including creating a needle felted leopard wool portrait. In this step-by-step tutorial guide, I will take you through the process and provide valuable tips and tricks to help you capture the likeness.
Step 1: Inspiration and Material Selection
When I was deciding on a topic for an open exhibition, I chose to challenge myself with a needle felted leopard portrait. Not only did I want to push my needle felting skills, but I also wanted to create something special for my daughter, Becca, who loves leopards. It seemed like the perfect opportunity to combine my passion with a new artistic challenge.
Before diving into the artistic process, I gathered the following materials to ensure a smooth and enjoyable felting experience:
Wool fibres: I chose carded wool slivers or a wool blend, in various colours to bring this needle felted leopard portrait to life, as they are easy to work with and provide excellent felting properties. I also added effect or specialty fibres like silk and bamboo to add extra texture and dimension to the picture.
Felting needles: I used a variety of felting needles with different gauges for the needle felting process. The needles have barbs that catch and bind the wool fibres together during the felting process. I used single needles in several gauges, from general to fine, depending on the technique I was using and had needles with differently coloured handles for each gauge, for easy identification. The gauge of a felting needle indicates its thickness or diameter, with higher numbers denoting finer needles. The number of barbs on the needle also affects the felting process, with more barbs leading to quicker felting and fewer barbs allowing for greater accuracy. Different needle shapes, such as triangular, crown, twisted, and star, offer versatility for various felting needs. You can find out more about felting needles in a previous blog, which you can find here.
Where to Start in Creating a Needle Felted Leopard Wool Portrait
To start, I recommend using 100% wool felted fabric, preferably with a thickness of 1.2mm. You can also experiment with other materials like linen, but it may require some practice to get the desired results. As for the wool, I find that using carded wool slivers with shorter fibre lengths works best. They come in a variety of beautiful colours and are easy to work with and blend.
Step 2: Preparing Your Workspace
Create a dedicated and organised workspace for your needle felting project which will help you to stay focused.
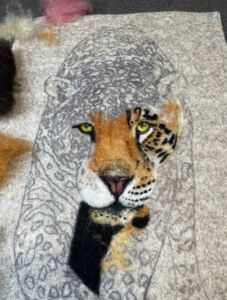
For needle felting projects like these, I use a firm density foam pad, approximately 4cm thick. It provides a solid yet pliant surface to work on. Before getting started, you’ll need a reference photo to guide you. Using a transfer pen, trace the outline of the leopard onto tracing paper, including important reference points, dark and light areas. I personally recommend Sulky transfer pens, as they can be ironed onto your wool sheet. Make sure to reverse the image when tracing so that it comes out correctly on the wool felt fabric.

Step 3: Choosing Colours and Blending for your needle felted leopard portrait
Next, let’s talk about the colours you’ll need for your needle felted leopard. Take a look at your wool stash and ensure you have all the necessary shades. Luckily, I found carded wool in rust, orange, and straw colours that I could blend to achieve the range I needed. Additionally, make sure to have plenty of black for the rosettes and background. For the eyes, I used various yellow hues along with green and grey. To add glints to the eyes and wetness to the nose, silk fibres worked perfectly, providing a beautiful lustre and shine.
Step 4: Focusing on the Eyes on your needle felted leopard portrait
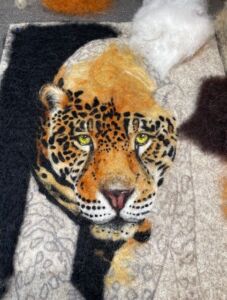
As you start the project, you might find that your creative workspace becomes a bit messy, with wool bits of different colours scattered around. Embrace the chaos, as it’s all part of the process. Now, let’s begin by focusing on the eyes. I always start with the eyes as they ground the artwork for me. Begin with the black outer rim of the eye and then blend the iris colour using yellows and greens. Gradually build up the layers, periodically checking and stepping back to ensure accuracy. Eyes play a crucial role in capturing the likeness of any subject, so it’s important to get them right.
Step 5: Crafting the Nose
Once you’re satisfied with the eyes, move on to the nose. Follow a similar process, adding black for the darker nostrils and philtrum. Fill in the base colour and continue building up the low lights and highlights to create depth and dimension.
Step 6: Working on the Facial Features for your needle felted leopard portrait
With the foundation set, it’s time to work on the area around the eyes. Start by blending the base colours, such as rust and oranges, to create texture. Add low lights, highlights, and the black rosettes or spots. I prefer to work on one area at a time before moving on to the next, gradually building up the artwork.
Step 7: Background and Shading
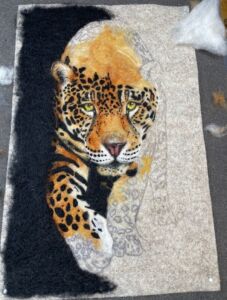
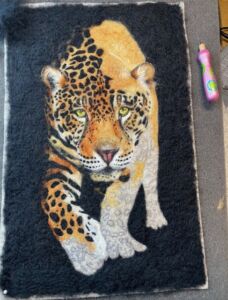
As you progress, fill in the background, adding shading and shadows to make the leopard appear to emerge from darkness into light. Work your way around the face, then extend to the back, sides, legs, and feet using the same techniques.


Step 8: Adding Whiskers to your needle felted leopard portrait
Adding whiskers can be a challenge, but there are various options to consider. Some materials you can use include horsehair, embroidery floss, real cat’s whiskers, or silk fibre twisted and smoothed into thin strands. For this project, I experimented with different options and found that horse tail hair worked best for achieving the desired look and feel. No horses are harmed in the collection process, as the donor simply has a shorter tail.
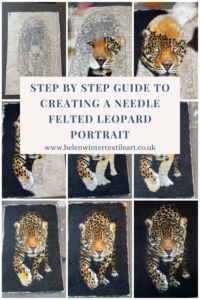
To attach the whiskers, thread the lengths onto a sewing needle and insert it into the artwork at the appropriate locations. Add a bit of glue to the back of the picture to secure it and cut the hair to the right length on the front. This method ensures a continuous and natural-looking line of whiskers, enhancing the realism of your leopard portrait.
Conclusion
Needle felting is a rewarding craft that offers endless possibilities. Whether you’re a beginner or experienced, embrace the art of needle felting, let your creativity flourish, and have fun bringing your needle felted animals and projects to life.
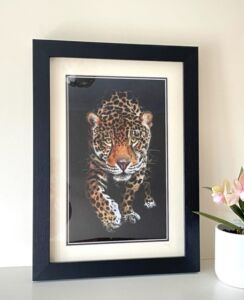
Remember, needle felting is a rewarding and enjoyable craft that offers endless possibilities for creating unique projects. Whether you’re a beginner or experienced, exploring new needle felting ideas and techniques can lead to incredible results, even a needle felted leopard wool portrait. So, embrace the art of needle felting, let your creativity flourish, and have fun bringing your needle felted animals and projects to life!
If you feel inspired to try needle felting yourself, take your time and continuously observe your reference image. However, if you’d like extra guidance and support, consider enrolling in my 1-to-1 needle felting tuition. With this personalized instruction, you’ll receive individualized guidance tailored to your skill level and goals. The flexibility to schedule lessons at your convenience allows you to progress at your own pace. During each session, I provide detailed feedback and assistance, ensuring you unleash your creativity and improve your skills.
To get started, we can have a preliminary chat to discuss your needs and aspirations. This initial consultation is entirely free and lasts no longer than 30 minutes.
Don’t wait, get in touch here and take the first step towards becoming a needle felting master! ♥