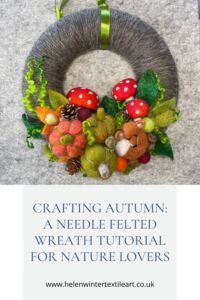
Immerse yourself in the vibrant hues of autumn with my needle felted wreath tutorial. Join me on a creative journey where each delicate poke of the needle captures the essence of the season. Discover the joy of crafting, connect with nature, and bring the magic of fall into your home. Let’s transform wool into art and celebrate the wonders of the natural world together.
Introduction To Creating A Needle Felted Wreath
Autumn is a season like no other. It’s a time when the world transforms into a picture of fiery reds, warm oranges, and golden yellows. The air is crisp, carrying the sweet scent of fallen leaves, and the world seems to slow down, inviting us to savour its beauty. It’s a season that awakens our senses, making us more attuned to the intricate details of nature – from the whispering rustle of leaves underfoot to the vibrant tapestry of colours adorning the trees.
In this needle felting tutorial, I’m eager to share not only the techniques and steps to create your very own needle felted autumn wreath but also the profound joy and inspiration that comes with it. This wreath is more than a craft project; it’s a celebration of the season’s fleeting beauty, a tribute to the wonders of nature, and an opportunity to infuse your surroundings with the same boundless joy that autumn brings to our hearts.
So, as we embark on this creative journey together, let’s capture the spirit of autumn in each delicate poke of the needle and let the colours of the season burst forth in a magnificent display of artistry and nature’s wonder. Welcome to the world of needle felting, where we transform wool into magic and autumn into everlasting art.
Why I Created This Needle Felting Tutorial
As a needle felting artist, my passion lies not only in creating intricate and beautiful pieces but also in sharing the joy and magic of this craft with others. I believe that art has the power to transcend boundaries and evoke emotions, and I have always been drawn to infuse the natural world with boundless joy, love, and inspiration through my creations.
Autumn, with its vibrant colours and the cosy embrace of falling leaves, has always been a season that fills my heart with wonder. It’s a time when the world transforms into a breath taking tapestry of reds, oranges, yellows, and browns, and each tree becomes a living masterpiece. The air carries the earthy scent of fallen leaves, and there’s a palpable sense of change and anticipation in every breeze. For me, autumn is a season that resonates deeply with the soul, inviting us to slow down and immerse ourselves in the beauty of the natural world.
I created this tutorial with a singular purpose in mind – to share the wonder of autumn with you. I want to extend an invitation to connect with nature through the art of needle felting and to bring the enchanting magic of autumn right into your home. It’s my way of paying tribute to a season that awakens our senses and fills our hearts with awe and appreciation.
Through the step-by-step guidance in this tutorial, I hope to not only teach you the techniques of needle felting but also to impart the profound connection between creativity and nature. As you embark on this creative journey, you’ll discover that each poke of the needle is not just a craft technique but a deliberate act of capturing the essence of the season.
Materials You’ll Need To Create A Needle Felted Wreath

Before we dive into the step-by-step instructions, gather these materials to get started:
– Felting needles
– Foam pad or felting brush
– Roving wool in autumnal colours (reds, oranges, yellows, and greens)
– A wreath frame or base (willow or polystyrene)
– Wool (Super Chunky is best) in natural colours for wrapping the wreath
– Wool curls (optional)
– Wool felt balls, 2cm in diameter (optional)
– Small fir cones, acorns, and nuts (optional)
– Decorative ribbon or twine
– Scissors
– Hot glue gun and glue sticks (care must be taken when using, as this will get very hot)
Step-by-Step Instructions: Crafting Your Autumn Needle Felted Wreath Magic
Let’s dive into creating the stars of the show, the pumpkins and mushrooms, for your stunning Autumn Wreath. And guess what? You can make as many as your heart desires to create a bountiful harvest of Mother Nature’s best.
Step 1: Preparing Your Workspace
First things first, let’s set the stage for your crafting adventure. Find yourself a cosy place with good lighting, lay out your trusty foam pad, and make sure all your materials are just an arm’s reach away.
To Make a Pumpkin

Now, let’s make a needle felted pumpkin
- Measure out a 50cm piece of wool in your chosen pumpkin colour. Fold it in half and tie a knot.
- Open up the fluffy ends on one side and fold them down over the knot.
- Grab your trusty 36-gauge felting needle and start poking away all over the surface to firm it up. Don’t forget to flip it over and repeat for the other side.
- Keep rolling and shaping to maintain that lovely round pumpkin form with dimples on top and bottom.
- To create those pumpkin segments, start felting a line from the top dimple, going straight down and around your pumpkin, all the way to the bottom.
- Repeat this on the opposite side to create 6 delightful segments.
- For those realistic ridges, take slim slivers of brown or green wool. Lay a thin strip down each ridge and felt it firmly into place.
- Repeat this for all 6 ridges to give your pumpkin that authentic look.
- Time for the stem! Take a small amount of your chosen stem colour, felt it flat, and roll it into a cute cylinder shape.
- Grab your 40-gauge needle and felt all over the surface, including the end, until it’s firm. Keep one end fluffy.
- To attach it to the pumpkin, spread out the fibres on the fluffy end, place it on the pumpkin, and felt those fluffy bits into the pumpkin all around the stem.
To Make a Needle Felted Mushroom

Now, let’s craft some enchanting mushrooms to add to your wreath’s charm.
- Start with the mushroom’s stalk. Measure out a 20cm length of white wool, fold it into thirds, and then in half along its length.
- Grab that 36-gauge needle again and start poking the surface while keeping the top end fluffy. Poke and move the stalk to maintain its lovely cylindrical shape until it’s firm.
- Next, let’s make a collar for the mushroom. Measure an 8cm piece of white wool, fold it in half along its length, and felt a 4.5 x 1 cm section into the felt. Gently felt it to the top half of the stalk, leaving the bottom of the collar loose.
- Onto the mushroom’s cap, measure a 10cm piece of white wool. Felt a semi-circle, about 7cm across, into the wool, focusing on the centre.
- Fold in the fluffy edges to create that dome-like cap shape and start felting all over. Once it’s semi-firm, add another layer of wool to give it a 3D effect.
- Add some colour to the cap by placing thin strips of light orange, mid, dark oranges, and dark red on top of it. Felt them into place.
- Time to attach the stalk to the cap! Place the fluffy end of the stalk under the cap and start felting it up into the cap.
- Repeat this on the front of your mushroom for a perfectly attached stalk.
- For that extra touch of realism, take small pieces of wool and gently felt them to the base of the stalk and under the cap’s “skirt.”
- Let’s add some white spots! Grab small amounts of white wool, roll them into little balls, and place them at the base of the cap. Keep adding until the cap is beautifully speckled with spots. Add as many as you like!
To make some leaves, check out my free tutorial here.
Step 2: Preparing the Wreath Base
If you’ve got a willow wreath frame, you’re all set to go! But if not, don’t worry; you can fashion a sturdy foundation by wrapping a polystyrene circular shape with natural-coloured wool.
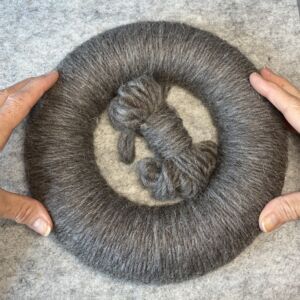
Now that our stars are ready, let’s move on to the next step.
Step 3: Attaching all Your Elements and Details
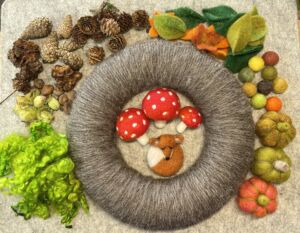
Gather all your materials and the pieces you’ve lovingly crafted for your wreath. It’s like bringing all the players together for a grand performance.
- Begin by creating your design on the wreath base. Use pins to secure the felted pieces in place until you’re delighted with how it looks. Snap a quick photo as a reminder.
- Once you’re satisfied with your design, remove all the pieces, and let’s get gluing! Start with the items at the back of your design, like the leaves and curls.
- Remember, when you’re pressing items into place, use a pen or something similar—avoid using your fingers; things can get pretty hot.
- Keep building up your design by gluing the next pieces to the wreath. Add more leaves, your first pumpkin, and then another one.
- Fill in any gaps with the felt balls and fir cones, and don’t forget the nuts.
- Add more leaves to keep building up your design, and finally, introduce the last pumpkin.
- Now, let’s switch to the opposite side and start building up that part of your wreath. Add some curls, mushrooms, and more leaves.
- Fill in any remaining gaps with extra leaves, felt balls, fir cones, and acorns if you’re using them.
- Keep adding felt balls to ensure there aren’t any gaps left. Take a step back and admire your masterpiece. If you spot any gaps, fill them in with either felt balls, fir cones, or acorns.
Step 4: Hang and Admire your needle felted wreath
To create a hanger, take some ribbon or decorative twine, and here’s the magic trick:
- Measure double the length you want, fold it in half, and tie a knot at the cut ends.
- Create a loop and thread the ribbon or twine through, making sure the knot is at the top.
- Ta-da! Well done. You did it, and your wreath is now ready to hang!

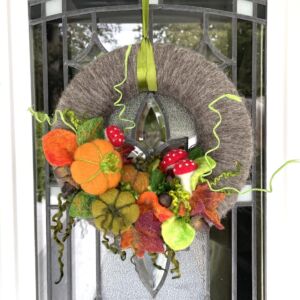


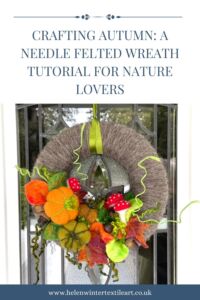
With all the elements in place, your wreath is a masterpiece waiting to shine. Find the perfect spot on your door, wall, or wherever you’d like to sprinkle a touch of autumn magic.
Now, stand back, take a moment to admire your creation, and feel the pride that comes from capturing the spirit of the season with your own hands.
If you’re hungry for even more detailed instructions, including a video and a downloadable PDF to craft your gorgeous wreath, you can find it right here.
And there you have it, a magnificent Autumn Wreath that’s not just a craft but a celebration of the magic of autumn and your own creative spirit. Congratulations!
Bonus Tip: Keep an eye out for upcoming tutorials and more crafting adventures to infuse your life with joy, love, and inspiration.
Looking for beginner-friendly needle felting projects? My latest book, The Beginner’s Guide to Needle Felting Basic Shapes & Projects, is now available on Amazon! It’s packed with step-by-step tutorials that show you how to create simple shapes and turn them into adorable animals and seasonal makes — including a pumpkin, mushroom, sleeping fox, Highland cow, stargazing hare, and classic teddy bear. All projects are designed without wire armatures, making them perfect for beginners. 👉 Grab your copy on Amazon here and start felting with confidence today!

Conclusion
Creating this Autumn Wreath is not just a craft; it’s a way to connect with nature and infuse your surroundings with joy and wonder. As you embark on this creative journey, may you discover that it’s not just about crafting an object; it’s about embracing the season’s magic and allowing it to flow through your fingertips.
In the seasons that follow, as you hang your Autumn Wreath with pride, may it serve as a constant reminder of the magical moments spent crafting, the beauty of the natural world, and the wonder that resides in the details of life. Let it be a testament to your creative spirit and your deep connection to the ever-changing tapestry of the seasons.
Share photos of your completed Needle Felted Autumn Wreath on @helenwintertextileart and inspire others to embark on their own creative journey. I can’t wait to see your completed wreath!
If you haven’t done so already why not come and join my Facebook group, The Needle Felting Community where I look forward to sharing my knowledge and passion for needle felting with you and connect with fellow nature-inspired artists, join here. We’d love to celebrate your creativity with our community.
Explore more of my tutorials and get inspired to create art that celebrates the beauty of the natural world; you can find them here.
Thank you for allowing me to be a part of your creative journey, and may the boundless joy of autumn forever reside in your heart.
If you have any questions or would like more inspiration for needle felting projects, feel free to reach out. Happy crafting!