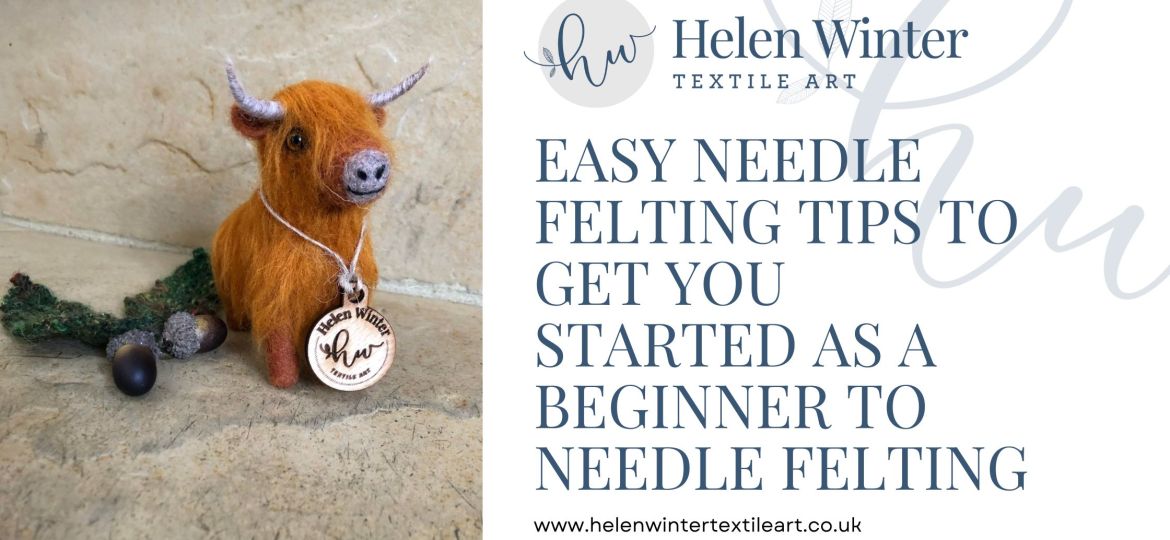
Dive into the enchanting world of needle felting with my beginner to needle felting friendly tips! Uncover the art’s secrets, from understanding needle felting needles to choosing the right wool for the perfect needle felting project. Learn the importance of quality needle felting tools and explore the additional needle felting equipment that will elevate your creations. Get comfortable in your creative space and discover the joy of needle felting and sculpting wool into unique masterpieces. Whether you’re a needle felting novice or seasoned artist, this guide will set you on a path of artistic fulfilment, weaving nature’s wonders and the essence of animals into every poke. Let the needle felting adventure begin!
Introduction to Get You Started as A Beginner to Needle Felting
When I first came across needle felting as a beginner, in 2010, there was only a few places to find helpful information to make my journey easier. I picked things up along the way and have experimented and tested as I created, some have failed but mostly these experiments have worked and have been enlightening. I’ve also embraced those failures as they’re an indication of how far I’ve come but also are valuable learning lessons.
So, whether you’re a seasoned artist or a curious beginner to needle felting, start with these easy needle felting tips to set yourself up for success. From choosing the right materials to understanding the basic needle felting techniques, these nuggets of wisdom will guide you through the initial stages of your artistic adventure. Let’s dive into the fundamentals and discover the joy of needle felting together.

Understanding the Needle Felting Process – What is it?
Before delving into the needle felting process, let’s demystify needle felting. Understand the mechanics behind this tactile art form, how wool fibres lock together, and how a simple needle can bring your visions to life. A solid understanding of the needle felting process will lay a strong foundation for your needle felting projects.
You might think needle felting sounds like a difficult, technical craft, but when you read this blog, you’ll realise needle felting is a simple, satisfying craft that anyone can do with a little knowledge and some basic tools.
Needle felting is an artistic craft that involves sculpting shapes, figures and flat pictures, using wool and special felting needles. This technique, both simple and versatile, allows creators to create remarkable pieces with minimal supplies. At the core of needle felting is wool, which, if you were to view under a microscope, would see overlapping scales just like fish scales.

When these scales are agitation, these scales come into contact with each other and lock together and cause the wool to felt. The needle felting needles, are unique tools with tiny barbs at one end and aligned in one direction and play a crucial part in the needle felting process. When the needle felting needle is repeatedly poked into the wool, the rhythmic action tangles the wool fibres together and interlock the scales, ultimately resulting in beautiful felt, see photo later in this blog to see a needle felting needle close up.
The origins of felting trace back to ancient times, with recent discoveries of artistic felted items in Siberian tombs dating back to 700 BC. Felt, one of the oldest known textiles, possesses useful properties like biodegradability and sound dampening. In the 19th Century, industrial felt making emerged with needle punching machines, used extensively, especially in the automotive sector.
In the 1980s, David and Eleanor Stanwood pioneered needle felting, realising its potential to mould wool fibres into desired forms. Over time, techniques evolved, turning needle felting into an amazing artform. Despite its intricate nature, needle felting is demystified in this blog, showcasing its simplicity and satisfaction, making it accessible to anyone with a touch of knowledge and basic tools.
Choosing The Right Type of Wool for Needle Felting
The first step in achieving even felting is selecting the right type of wool. Different types of wool fibres have varying degrees of thickness and felting properties. Experiment with different wool types to find the one that works best for your project and felting style.
The advice and tips within this blog are not definitive but based on my own experience, through trial and error and is just guidance to get you started. You may find, over time and as you gain skill and experience, you’ll find you have your own wool preferences for different projects.
Not all wool is the same and the difference and recommendations can be quite confusing. I generally only use one or two types of wool to create a wide selection of projects, so, I would suggest you, after reading this blog, experiment and find a couple that work for you and you’ll be off creating a multitude of amazing needle felting projects.
Different wool fibres tend to felt in different ways, so it’s important to know how it will react to the felting needle before you purchase it.
You may have come across recommendations to use wool roving for your needle felting projects. I have views on the use of this but before I share them here’s a brief explanation of what it is.
Wool roving is a long thick strand of fibres, typically sourced from sheep’s wool but can also be materials like silk, alpaca, or various natural and synthetic fibres. The cleaning and carding process involves the use of a carding machine to loosen the fibres and removes impurities, preparing the material for use. The outcome is an unstructured batt of fibres arranged in parallel, maintaining their original state or ready for dyeing in different colours.


As you can see from the above photo and description, the fibres in wool roving are very straight and ordered making the felting process a lot harder to achieve. Ideally, we’d like the fibres to be higgledy-piggledy which makes them far easier to felt together.
Following recommendations, a lot of people start their needle felting journey with Merino wool roving which is just not suitable for a beginner to start with. It’s is too fine, doesn’t felt easily and makes the whole project hard work. Merino roving is however, perfect for replicating fur on 2D pet portraits or 3D sculptures.
My preference for most of my needle felting projects is to use carded wool sliver. This is processes so the wool fibres end up less straight and ordered with the fibres more higgledy-piggledy meaning the fibres cross each other and are far easier and quicker to needle felt together, see the photo above.
You may have come across the term core wool. Core wool refers to the material used for the central or bulk portion of a needle felting project. It typically consists of medium to coarse wool, serving as the foundational element. When incorporating a different colour or utilising fine wool like Merino Corriedale, core wool becomes essential. It is used in the initial needle felting stages to shape the basic form, primarily for larger 3D projects and later covered by dyed wool for additional detailing.
However, not every project requires core wool. In instances like crafting a small 3D hare or a sheep, using coarse fibres such as Corriedale or Shetland tops throughout is enough. These wools felt really well without the need for a core wool layer. Finishing touches and details can then be added using a different coloured wool as needed.
If you’re creating a larger project, it’s really useful to use core wool to build and bulk out the base of the shape and is more cost effective. For example, when make my 3D dog and animal sculptures, I’ll used core wool to wrap the body base and head. I’ll then use the wool I have chosen for the final coat or covering.
For smaller projects, like pumpkins, mushrooms or small animals, I mainly use carded wool slivers of the colour of the project, for both inside and out. It’s great to needle felt and is a joy to work with, felts up quickly and easily and is really cost effective. I use it for almost all of my needle felted animals and in the majority of my needle felting kits.
Using the Right Needle Felting Needles
Equip yourself with the right tools. Learn about the different types of needles available and why quality matters. Investing in the right needles ensures precision and durability, making your needle felting experience smoother and more enjoyable.
There are different types of needle felting needles available, each designed for specific purposes and techniques. Understanding their variations will help you achieve desired results in your needle felted projects. The quality of the needle felting needles will make a big to the end project; make sure to buy from a reputable supplier, I buy mine from both Heidifeathers and World of Wool.

Triangular Needles: These have 3 edges and a straight shaft with regular barbs along their shaft, and are used for general needle felting. They come in different gauges, which refers to the thickness of the needle. Thicker needles are suitable for initial shaping and attaching parts, while finer needles are ideal for adding details.
Star Needles: Star needles have multiple barbed tips arranged in a star-shaped pattern. They are perfect for quickly felting large areas and blending fibres.
Spiral/Twisted Needles: These needles have a twisted blade, allowing them to create a spiral path while felting. Spiral needles are excellent for creating smooth surfaces and blending colours. They are also useful for attaching parts securely.
Crown Needles: These needles have three sides, with one barb on each side, all level near the tip, perfect for finer details and adding wisps of wool.
Reverse Needles: These needles have the barbs pointed the opposite way as regular felting needles, so they pull the fibre outward instead of pushing and felting fibre inwards. These are typically used for making a furry (as opposed to smooth) surface for 3D forms.
Identifying Needle Felting Needles
Identifying needle felting needles can be challenging, as they typically lack markings or labels. However, there are some general characteristics that can help you differentiate between different types of needles:
Gauge: The gauge refers to the thickness of the needle. A higher gauge number indicates a finer needle, while a lower gauge number corresponds to a thicker needle. For example, a 40-gauge needle is finer than a 36-gauge needle.
Shaft Colour: Some manufacturers colour code the shafts of their needles to distinguish them. However, this can vary between brands, so it’s essential to refer to their individual colour charts or guides.
Shape and Size: Different needle types have distinctive shapes and sizes. Familiarise yourself with the shape and length of each type to recognise them easily.
You can still use the needle felting needles as they are, but because they were originally designed to be used in an industrial machine, they’re not well-suited for hands. You may notice they’re not comfortable to use for a long period of time so you might want to use a wooden handle that can be bought and added to the end.
You can read more about needle felting needles in this blog.

Other Needle Felting Equipment That Will Help You
Besides felting needles, a few other tools are indispensable for a successful needle felting experience:
Felting Pad/Base: A felting pad or base is a cushioned surface that provides support and protects your work surface while needle felting. Choose a dense foam pad or a brush-like mat specifically designed for this purpose.

Multi tools: Once you become a bit more proficient you might want to invest in some multi tools which will help speed up your needle felting, these range from 3 needle pen tools to 8 needle multi tools. They each have their different uses but to get the best out of them and to ensure you don’t break lots of needles, I would recommend you have your needle felting techniques perfected and you’re confident before you consider buying any.
Scissors: A pair of sharp scissors will come in handy for cutting wool roving and trimming your finished projects.
Hair Straighteners: Perfect for flattening felt for ears, leaves and animal pelts.
Wire Armature: For needle felted animals or sculptures requiring a sturdy structure, wire armatures provide support and enable posing. Armature wire snips and pliers are necessary for this step.
Get Comfortable to Needle Felt
Creating art should be a joy, not a strain. It’s important of set up a comfortable workspace, choose ergonomic tools, and maintain a good relaxed posture. When you’re physically at ease, your creativity just flows. Create a dedicated space for your needle felting projects, this will help you to stay organised and focused, it doesn’t need to be huge, I currently work from my armchair in the corner of the lounge and have my supplies close to hand.
The Needle Felting Action
Now that you’re acquainted with the basics, let’s dive into the heart of needle felting, the actual process.
Using the proper techniques during your needle felting project will make all the difference in how you feel and your needle felting project turns out
There are 2 basic needle felting actions, to firm up and compress the wool into a shape, a confident up and down action is needed. Think in your mind, the shape you are trying to achieve and remember that the direction you push the needle is the direction the wool will go. This action is good to start off a project to firm up and get the shape you’re after.

To felt just the surface of an object, you’ll use your needle at a 45 degrees angle to your work. This is perfect for finishing off a project and smoothing fuzzy felt.

As you become more skilled, you’ll use both of these needle felting techniques in varying degrees and you’ll instinctively know which you use and when.
To prevent your needle felting needles from breaking, keep your needle felting action smooth and relaxed and keep needle felting straight in and out of your work. Needles break when you’re needle felting too fast and your action becomes a bit erratic and not straight in and out of your work; your hand might twist or move away from the straight axis. While the temptation is to speed up the project by applying more pressure to the needle exists, it’s essential to recognise that needle felting needles are fragile and prone to breakage; a common challenge for needle felting beginners. Gentle poking not only preserves the needle felting needle’s longevity but also prevents wool fibres from becoming entangled in the felting pad, potentially jeopardising your project.
Additionally, a delicate touch serves your fingers well. Rushing and exerting excessive force increases the risk of accidentally jabbing your fingers. Opting for a light touch minimises the impact of an unintentional finger poke.
If you encounter resistance while gently pushing the needle felting needles into your felted project, refrain from applying undue pressure. Pull the needle felting needle out and attempt a different location. Difficulty in needle insertion indicates a densely packed area and forcing the needle won’t benefit. Instead, find other sections of the project with more flexibility to avoid unnecessary needle breakage.
Another way to stop your needles from snapping, is to make sure you’re using the right needle for the right project and at the right time.
Every stage of a project is unique and so are the needles you should use. While everyone is different, and it may take some time to figure out your method, most needle felters like to start with larger needles, 36 or 38 gauge needles, before they move their way down to finer needles like 40 to 42 for precision and detailed work.
Choosing an Achievable Beginner to Needle Felting Project
Excitement levels are high, and you’re ready to creating your first beginner to needle felting project! But where to start? Selecting an achievable needle felting project ensures a sense of accomplishment and motivates you to tackle more complex designs as you progress.
If you’re uncertain about where to start with needle felting and prefer not to purchase individual tools, opting for a compact beginner’s needle felting kit is a wise choice. These kits provide a cost-effective solution, bundling all necessary materials into one package designed for a single needle felting project. Completing the project offers valuable insights into the mechanics of needle felting, helping you gauge whether it’s a craft you’d like to explore further.
I have the prefect beginner needle felting kits, several different cute animals to choose from. Because of the soft, fuzzy nature of the wool fibres, animals are one of the top projects available.


You can view my range of perfect beginner needle felting kits here
Needle felting is an amazing craft, and while advanced techniques are needed for intricate projects, simplicity doesn’t equate to dullness. On the contrary, simplicity can radiate beauty. Investing time in refining tiny details reveals the unique characteristics that distinguish your crafts. It’s in these subtleties that the true appeal of your creations shines through.
Ask For Help as a Beginner to Needle Felting
No artist is an island. Don’t hesitate to seek guidance when needed as a beginner to needle felting. Whether it’s troubleshooting a technical challenge or asking for feedback on your work, reaching out to fellow needle felters and mentors can provide valuable insights and foster a sense of community.
Join a Needle Felting Community
Connect with like-minded individuals who share your passion for needle felting, especially as a beginner to needle felting. Joining a needle felting community provides a platform to exchange ideas, seek advice, and showcase your creations. The collective creativity of a community can be a powerful source of inspiration and support on your artistic journey. Come and join me in my The Needle Felting Community group on Facebook, to connect with me and other needle felters and learn from our experiences. I’m here to help you on your needle felting journey, to take you from beginner to advanced, from overwhelmed to skilled and a great way to begin that journey is in the group.
My FREE Needle Felted Hedgehog is ideal to try as your first project, you can find it here.

Create Beautiful Needle Felted Landscapes Book
If you love the idea of capturing the beauty of nature in wool, my book Create Beautiful Needle Felted Landscapes is the perfect guide to help you bring your vision to life! Whether you’re new to needle felting or looking to refine your skills, this book walks you through six stunning landscape projects, packed with step-by-step instructions, expert tips, and creative techniques to add depth, texture, and realism to your work.
You’ll learn how to blend colours seamlessly, create perspective, and add those special details that make a wool painting truly stand out. Plus, I share my personal insights on inspiration, composition, and how to bring movement and emotion into your landscapes.
📖 Create Beautiful Needle Felted Landscapes is now available on Amazon! Grab your copy here (if you have issues accessing the book, please search for it in your own countries Amazon domain site)

Or Looking for beginner-friendly needle felting projects? My latest book, The Beginner’s Guide to Needle Felting Basic Shapes & Projects, is now available on Amazon! It’s packed with step-by-step tutorials that show you how to create simple shapes and turn them into adorable animals and seasonal makes — including a pumpkin, mushroom, sleeping fox, Highland cow, stargazing hare, and classic teddy bear. All projects are designed without wire armatures, making them perfect for beginners. 👉 Grab your copy on Amazon here and start felting with confidence today!

Follow Beginner to Needle Felting Tutorials
Guidance is key, especially in the early stages. Explore beginner to needle felting tutorials that break down needle felting techniques and projects step by step. Whether through online videos or written guides, tutorials offer valuable insights and tips, accelerating your learning curve.
I have several FREE needle felting projects to choose from, from a cute hedgehog, bunny and leaves, all are fulfilling project to get you started on your needle felting journey, you can find them here.

There are some stunning needle felted designs just waiting for you! But, in the beginning, it’s best to start slow. Have you ever started something a little too fast and were totally burnt out and overwhelmed by the end?
You can view my range of online needle felting tutorials here
Be Patient, Practice a Lot, and Have Fun
Rome wasn’t built in a day, and neither are needle felting masterpieces. Embrace the needle felting learning process with patience, dedicating time to practice regularly. Remember, every poke brings you closer to honing your needle felting knowledge and skills. Most importantly, let the joy of creating be your constant companion; have fun throughout your needle felting journey!
You may find two hours in, and that initial ball of fluff bears no resemblance to the envisioned needle felted project but take a deep breath! It’s a common experience among crafters to feel projects falling into place only at the eleventh hour, so there’s no need to worry.
As a beginner to needle felting, the early stages might be a tad disheartening and disappointing, yielding pieces that seem dismembered and dishevelled. But here’s the silver lining: with a bit of time and practice, those initial struggles become stepping stones. In a few weeks or months, you’ll look back at those needle felting projects with a smile, acknowledging the substantial progress you’ve made.
As needle felting enthusiasts, we engage in needle felting not just as a creative outlet but also as a stress-reliever; an activity born out of love. So why rush the needle felting process? Embrace the journey, relish in the mistakes and setbacks. When it feels overwhelming, simply set your needle felting project aside and revisit it tomorrow.
Consider this a friendly caution: needle felting has a knack for becoming highly addictive! As a beginner to needle felting, I’m genuinely thrilled for the exciting needle felting journey you’re about to undertake. Enjoy every moment of it!

Conclusion
As you embark on your beginner to needle felting adventure, remember that it’s not just about creating beautiful needle felted pieces; it’s about the journey itself. The art of needle felting invites you to explore, learn, and express your creativity in a unique and tactile way.
By understanding the needle felting process, choosing quality materials, and embracing a comfortable workspace, you lay the foundation for a fulfilling artistic experience. The right tools, achievable needle felting projects, and a supportive community contribute to your growth as a needle felter.
Don’t be afraid to ask for help and connect with fellow needle felting enthusiasts; needle felting is a communal art form, and the shared passion of a community can inspire and elevate your craft. Follow needle felting tutorials, be patient with yourself, and most importantly, have fun throughout the needle felting process.
Happy felting.