Embark on your needle felting adventure with my straightforward 10 steps guide to perfect needle felting for beginners. This craft, while initially daunting, can quickly become a source of joy as you learn to transform wool fibres into stunning needle felting sculptures and artworks. Dive into my FREE guide to Blending and Creating Your Own Wool Colours to get started on the right foot with the perfect shades for your projects. Needle felting is a fulfilling journey, start slow, enjoy the process, and watch as your creations come to life.
Introduction to 10 Steps to Perfect Needle Felting for Beginners
Needle felting is a captivating craft that transforms wool fibres into two and three-dimensional creations from beautiful wool paintings to cute and astonishing animal sculptures. Whilst it may seem daunting at first, with a little practice and these 10 steps, you’ll be well on your way to crafting beautiful and unique pieces.
But before you get going why not download my FREE guide to Blending and Creating Your Own Wool Colours, perfect for when you can’t find the right colour for your work of art.
Step 1: Gather Your Essential Materials
• Wool: Start with carded wool slivers. These are more readily felted compared to wool roving, which can be challenging for beginners. Avoid Merino wool roving for initial projects; it’s finer and more difficult to felt. I use carded slivers for 2d landscape paintings and animal art and wool roving for feathers and long fur on my pet portraits.
• Needles: Begin with a set of triangular needles in medium gauges like 36 or 38. These are versatile for both shaping and adding details. 40 and 42 gauge needles are perfect for finer details, like eye details and noses.
• Felting Mat: A dense foam pad or a specialised felting mat provides the necessary resistance for needle penetration.
• Finger Guards (optional): Protect your fingers from needle pricks.
• Scissors: A pair of sharp embroidery scissors will come in handy for cutting wool slivers and trimming your finished projects.
You can read more about which wool and needles to use in this blog ‘Easy Needle Felting Tips To Get You Started as a Beginner to Needle Felting’
Step 2: Choose a Simple Starter Project Perfect For Needle Felting for Beginners
Begin with a straightforward project like a small ball, a heart, or a basic shape. This allows you to practice fundamental techniques without getting overwhelmed.
Start with simple shapes to build your confidence. A sphere can be formed by rolling the wool into a ball and evenly stabbing it into a compact form. Similarly, cylinders are created by rolling the wool into a tube shape and applying focused felting along the sides.
You can find out more about basic shapes in my blog, perfect for needle felting for beginners ‘How to Needle Felt Basic Shapes, Easy Tips and Techniques’
Once you’re comfortable with basic shapes, adding details helps bring your creations to life. Use finer needles for delicate work, and experiment with mixing colours for added depth and realism.
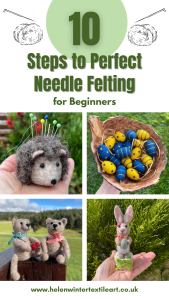
My FREE Needle Felted Hedgehog tutorial is a perfect starting point! It provides a step-by-step guide, making it easy to follow along.
Step 3: Prepare Your Wool
• Not all wool is the same and the difference and recommendations can be quite confusing. I generally only use one or two types of wool to create a wide selection of projects, so, I would suggest you, experiment and find a couple that work for you and you’ll be off creating a multitude of amazing needle felting projects.
• Tear the carded wool slivers into small, manageable pieces. This helps with easier handling and more even felting. Experiment with different sizes to see what works best for you.
• Blending different colours of wool can help you achieve the exact shade needed for your project. I have a FREE guide ‘Blending Colours And Create Your Own Wool Colours’ that shows you which you can find here.
Step 4: Master the Basic Needle Felting Techniques
• Stabbing: Using the proper techniques during your needle felting project will make all the difference in how you feel and your needle felting project turns out. This is the foundation of needle felting. Hold the wool in your non-dominant hand and stab the needle repeatedly into it at a 90-degree angle. Imagine you’re pushing the needle straight through the wool, perpendicular to your work surface. This technique is crucial for building the core of your project and firming up the shape.
• Poking: There are 2 basic needle felting actions, to firm up and compress the wool into a shape, a confident up and down action is needed. Think in your mind, the shape you are trying to achieve and remember that the direction you push the needle is the direction the wool will go. This action is good to start off a project to firm up and get the shape you’re after.
• To felt just the surface of an object, you’ll use your needle at a 45 degrees angle to your work. This is perfect for finishing off a project and smoothing fuzzy felt.
Step 5: Shaping Your Needle Felting for Beginners Project
• Start with a Core: If creating a 3D object, create a small core of tightly felted wool to form the base. Think of it as the skeleton of your project. Gradually build upon this core, adding layers of wool and felting each layer firmly before adding the next.
• Build Layers: Imagine you’re sculpting with wool. Add layers gradually, ensuring each layer is well-felted before proceeding. This will prevent your project from becoming loose or falling apart.
As you become more skilled, you’ll use both of these needle felting techniques in varying degrees and you’ll instinctively know which you use and when.
Step 6: Add Details (Optional for Beginners)
For simple projects, you can add details like eyes or a mouth using small pieces of contrasting wool. This is where you can start to get creative! Use small pieces of wool and carefully felt them in place.
Step 7: Finishing Touches For Needle Felting for Beginners
• Smooth and Refine: Once your project is shaped, use gentle poking motions to smooth out any rough edges and refine the surface. Pay attention to areas that might be uneven or have visible needle holes.
• Hardening: Continue felting until your project feels firm and sturdy. You should be able to gently squeeze it without it deforming significantly.
Step 8: Troubleshooting
• Uneven Felting: If your project feels uneven, continue felting the less dense areas. Pay close attention to areas that feel softer or less compact.
• Holes: To fix a hole, place a small amount of matching wool over the area and gently needle felt it into place. The angle you use in your felting project will also make a difference. Felting at 45 degrees will help to reduce poke holes from being visible, also try using a finer gauge needle.
• Broken Needles: To prevent your needle felting needles from breaking, keep your needle felting action smooth and relaxed and keep needle felting straight in and out of your work. Needles break when you’re needle felting too fast, and your action becomes a bit erratic and not straight in and out of your work; your hand might twist or move away from the straight axis. While the temptation is to speed up the project by applying more pressure to the needle exists, it’s essential to recognise that needle felting needles are fragile and prone to breakage; a common challenge for needle felting beginners. Gentle poking not only preserves the needle felting needle’s longevity but also prevents wool fibres from becoming entangled in the felting pad, potentially jeopardising your project.
Step 9: Care and Maintenance
• Handle with Care: Avoid dropping or squeezing your finished piece.
• Dusting: Gently dust your creation with a soft brush. You can also use a can of compressed air to remove dust.
Step 10: Embrace the Journey and Seek Inspiration
• Explore: Look for inspiration in nature, art, and everyday objects. The possibilities are endless!
• Experiment: Try different colours, textures, and techniques. Don’t be afraid to step outside your comfort zone and try something new.
• Join a Community: Connect with other needle felters online or in local groups for support and inspiration. My The Needle Felting Community group on Facebook is a great place to start. Share your creations, ask questions, and learn from other needle felters.
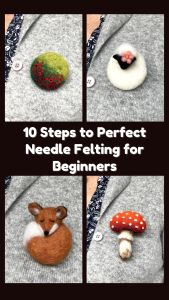
Create Beautiful Needle Felted Landscapes Book
If you love the idea of capturing the beauty of nature in wool, my book Create Beautiful Needle Felted Landscapes is the perfect guide to help you bring your vision to life! Whether you’re new to needle felting or looking to refine your skills, this book walks you through six stunning landscape projects, packed with step-by-step instructions, expert tips, and creative techniques to add depth, texture, and realism to your work.
You’ll learn how to blend colours seamlessly, create perspective, and add those special details that make a wool painting truly stand out. Plus, I share my personal insights on inspiration, composition, and how to bring movement and emotion into your landscapes.
📖 Create Beautiful Needle Felted Landscapes is now available on Amazon! Grab your copy here (if you have issues accessing the book, please search for it in your own countries Amazon domain site)

Or Looking for beginner-friendly needle felting projects? My latest book, The Beginner’s Guide to Needle Felting Basic Shapes & Projects, is now available on Amazon! It’s packed with step-by-step tutorials that show you how to create simple shapes and turn them into adorable animals and seasonal makes — including a pumpkin, mushroom, sleeping fox, Highland cow, stargazing hare, and classic teddy bear. All projects are designed without wire armatures, making them perfect for beginners. 👉 Grab your copy on Amazon here and start felting with confidence today!

Conclusion to 10 Steps to Perfect Needle Felting for Beginners
Needle felting is a journey of discovery. Don’t be afraid to experiment and have fun! With practice and patience, you’ll be amazed at the beautiful creations you can bring to life.
Remember, the key is to start slow, be patient with yourself, and enjoy the process. Don’t get discouraged if your first few projects don’t turn out exactly as you envisioned. Every project is a learning experience.
I encourage you to explore my FREE Needle Felted Hedgehog tutorial and other beginner-friendly projects to gain hands-on experience.