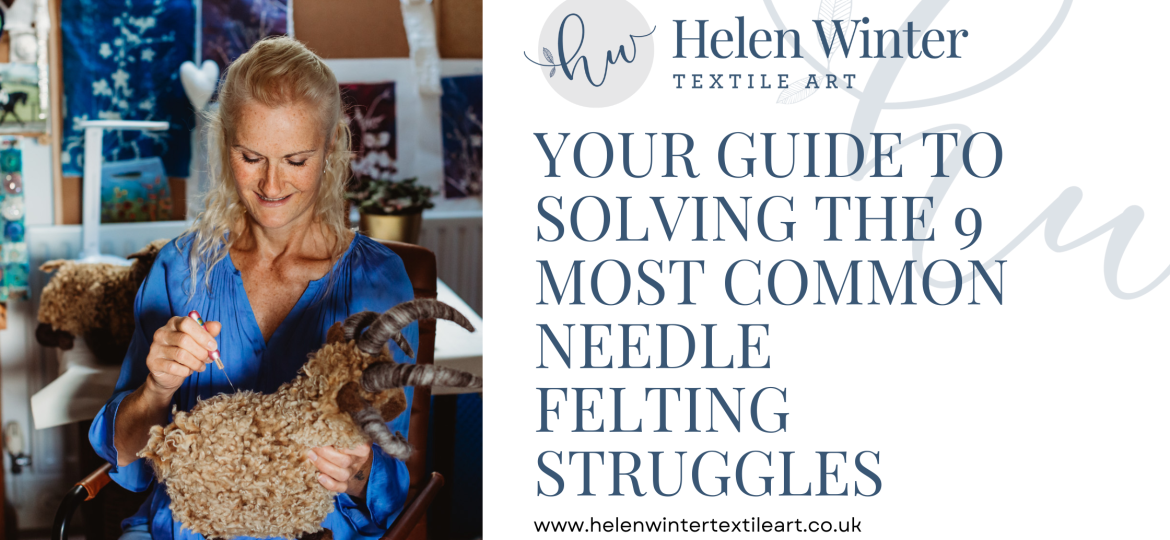
Common needle felting struggles for beginners include broken needles, uneven surfaces, finger pricks, managing wool, shaping, and fuzziness. This guide provides practical solutions for each issue, such as proper needle handling, consistent poking, using finger protection, working with small amounts of wool, practicing basic shapes, and employing finer needles for a clean finish. But before we begin, why not download my FREE guide to Blending Wool Colours here.

Needle felting, the magical process of transforming fluffy wool fibres into two and three-dimensional creations with a specialised barbed needle, has captured the hearts of crafters worldwide. Its accessibility and the sheer joy of watching wool take shape make it an incredibly rewarding hobby. There’s something super satisfying about turning a handful of fluffy wool into a detailed sculpture, whether it’s an animal, a landscape, or a tiny toadstool. However, like any craft, the journey for beginners isn’t always smooth sailing. From frustratingly broken needles to lumpy, uneven surfaces, those initial steps can sometimes feel more like navigating a woolly minefield than creating a masterpiece.
Introduction
But if you’re new to needle felting, you’ve probably hit a few bumps along the way. Don’t worry, it’s completely normal, and you’re not alone! Every seasoned needle felter has been there. The stumbles and the “oops” moments are simply part of the learning curve. The good news is that many of the common challenges faced by beginners have straightforward solutions. This blog post is your friendly guide to navigating these early hurdles, equipping you with the knowledge and techniques to overcome those “needle felting nightmares” and confidently continue your creative adventure.
This blog is here to walk you through some of the most common beginner frustrations (ahem, broken needles, fuzzy messes, and sore fingers anyone?) and how to fix them so you can keep enjoying the process and building your skills.
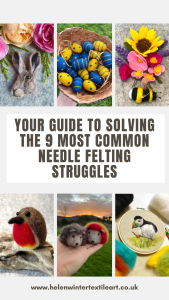
Common Needle Felting Struggles 1, The Dreaded Broken Needle
Ah, the dreaded snap! The sound of a breaking needle is a rite of passage for many beginner needle felters. It’s frustrating and can halt your creative flow. But understanding why needles break is the first step to preventing it.
Why do needles break? Several factors contribute to this common mishap:
• Incorrect Angling: Holding the needle at an angle instead of straight up and down puts undue stress on the delicate shaft. The barbs are designed to catch fibres when moving vertically, not laterally.
• Excessive Force: Trying to felt too quickly or pushing too hard, especially when the wool is already quite dense, can easily snap the needle. Remember, it’s the repeated piercing action, not brute force, that felts the wool.
• Poor Quality Needles: Cheaper needles can be more brittle and prone to breaking. Investing in good quality needles from reputable suppliers can make a significant difference.
• Hitting a Hard Surface: Accidentally hitting your work surface instead of just the wool is a surefire way to break a needle.
Practical Solutions:
• Maintain a Straight Angle: Consciously focus on holding your needle perpendicular (at a 90-degree angle) to your wool. Imagine an invisible line going straight up and down.
• Use Gentle, Repetitive Strokes: Let the sharpness of the needle do the work. Use a consistent, rhythmic up-and-down motion without excessive force. If the needle feels stuck, don’t force it – try a different area or ensure your angle is correct.
• Invest in Quality Needles: While it might seem tempting to opt for the cheapest option, good quality needles are sharper, stronger, and will ultimately last longer, saving you frustration and money in the long run. Experiment with different gauges for different stages of felting.
• Protect Your Work Surface: Always work on a forgiving surface like a foam mat or a specialised felting brush mat. This provides resistance for the felting process while protecting your needles.

Common Needle Felting Struggles 2, Smoothing Out Uneven Surfaces
Ever felted a shape only to find it riddled with bumps, lumps, and an overall uneven texture? This is another common frustration for beginners. Achieving a smooth, consistent surface takes practice, but these tips will help you get there.
The Problem of Uneven Felting: Unevenness occurs when some areas of your wool are felted more densely than others. This can happen due to inconsistent poking, focusing too much on one spot, or not distributing the wool evenly in the first place.
Tips for Achieving Smooth, Consistent Surfaces:
• Consistent Poking Technique: Aim for consistent depth and spacing with your needle strokes. Avoid deep jabs in one area and shallow pokes in another. A steady, even rhythm is key.
• Rotate Your Workpiece: Regularly turn and rotate your project as you felt. This ensures that you are working on all sides and angles, leading to more even compression and a smoother overall finish.
• Check Density Regularly: Gently squeeze your felted piece to feel for denser and softer areas. Focus your attention on the softer spots until they feel similar in density to the rest of your creation.
• Use Different Needle Gauges: As your project becomes denser, switch to a finer gauge needle. Finer needles help to refine the surface and eliminate those last little bumps without adding bulk.
• Layering Wool Evenly: When building up your project, try to layer the wool evenly. Avoid adding large clumps in one go, as this can lead to uneven felting.

Common Needle Felting Struggles 3, Finding Suitable Beginner’s Needle Felting Projects
One of the initial struggles for beginners in needle felting is finding suitable projects to start with. As a novice, it’s essential to choose projects that are relatively simple and straightforward, allowing you to grasp the basic techniques involved. Look for projects specifically designed for beginners, such as needle felted animals with uncomplicated shapes.
To overcome this challenge, search online for beginner’s needle felting projects or needle felted tutorials for beginners or why not try my FREE Needle Felted Hedgehog or Bunny pattern where I take you through the whole process, step-by-step, making it easier to get started.
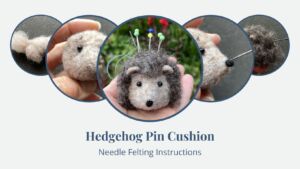
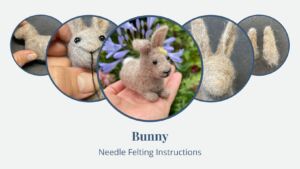
You can also try these cute fridge magnets of brooches, which are a perfect help to get you started on your magical needle felting journey. They come with detailed pictorial instructions and video tutorials to help you understand the process better. You can download then straight away here.

Common Needle Felting Struggles 4, Finger Protection is Key
Stabbing yourself with a felting needle is, unfortunately, something most beginners experience at least once, but it really doesn’t have to become a regular part of the process. There are plenty of ways to protect your fingers while you work.
Leather finger guards are a popular choice because they’re both comfortable and flexible. Silicone thimbles are another great option, especially since they provide good grip and are easy to clean. Even a simple plaster can offer some basic protection in a pinch if you don’t have anything else handy.
Beyond guards, a few extra safety habits go a long way: always work on a stable surface like a foam pad or wool mat, try to stay focused (especially if you’re multitasking or watching TV), and consider using a multi-needle tool for covering larger areas, it speeds things up and keeps your fingers out of harm’s way.
Common Needle Felting Struggles 5, Understanding the basic techniques and principles of needle felting.
Another hurdle faced by needle felters, both beginners and experienced, is mastering the essential techniques. Understanding how to handle the felting needles, create shapes, and achieve desired textures can be daunting initially. However, with practice and patience, you can become proficient in these techniques.
Begin by learning the basic stabbing motion, which involves repeatedly poking the felting needle into the wool fibres to interlock and shape them.
Practice on small pieces of wool to develop control and achieve the desired density. As you progress, experiment with different needles to understand their variations in gauge and size. You can find out more about felting needles in my blog Needle Felting Needles, The Ultimate Guide for Beginners.
To refine your skills, explore needle felting tutorials that focus on specific techniques, such as adding details, creating three-dimensional shapes, or blending colours. These tutorials often break down the steps and provide visual references, enabling you to learn and improve gradually.
Common Needle Felting Struggles 6, Taming the Woolly Beast
Wool, in its loose, fluffy form, can sometimes feel like a wild entity. Beginners often struggle with managing the fibres effectively.
Wool Management Challenges:
• Overworking: Felting too much in one area can result in a dense, hard, and sometimes distorted shape.
• Using Too Much Wool at Once: Trying to felt a large amount of wool quickly can lead to an unevenly felted core and a bulky, unmanageable piece.
• Wool “Misbehaving”: Loose fibres can get caught on your needle shaft, making it difficult to insert and remove.
Advice on Working with Small Amounts and Understanding Wool Types:
• Start Small: Begin by working with small, manageable amounts of wool. Gradually add more layers as needed to build up your shape. This allows for better control and even felting.
• Tear, Don’t Cut: Instead of cutting wool with scissors, gently tear off small sections. This creates a more feathered edge that blends more seamlessly into your project.
• Understand Wool Behaviour: Different wool breeds have different fibre structures and will felt differently. Some felt quickly and densely, while others are softer and airier. Experimenting with different types will help you understand their unique characteristics.
• Keep Your Needle Clean: Regularly wipe your needle with a cloth to remove any stray fibres that might be causing friction.
(Imagine here a photo showing different types of wool fibres, such as Merino, Corriedale, and Romney.)
Common Needle Felting Struggles 7, Shaping Your Creations
Transforming a ball of fluff into a recognizable shape can feel like a daunting task for beginners. Achieving specific forms requires patience and practice.
The Difficulty of Achieving Specific Shapes: It takes time and a good understanding of how wool fibres compress and hold their form through felting.
Recommend Practice, Reference Photos, and Tool Exploration:
• Practice Basic Shapes: Start with simple geometric shapes like spheres, cylinders, and cones. This will help you develop your technique and understand how the wool responds to the needle.
• Use Reference Photos: When aiming for a specific subject, keep reference photos handy. Observe the key shapes and proportions.
• Explore Different Needles and Tools: Different needle gauges are useful for different stages of shaping. You might also find tools like shaping templates or reverse barbed needles helpful for specific effects.
• Build Up Gradually: Don’t try to create complex shapes all at once. Break down your design into simpler components and felt them individually before joining them.
Basic Shape Instructions (Example: Creating a Simple Sphere):
1. Take a small amount of wool and gently roll it into a loose ball.
2. Begin felting the ball all over, rotating it frequently to ensure even compression.
3. As the wool starts to felt and become firmer, continue shaping it with your needle, focusing on any uneven areas.
4. Gradually increase the density by continuing to felt evenly until you achieve a firm, round sphere.
You can find more tips and inspiration about needle felted shapes and techniques in my blog How to Needle Felt Basic Shapes, Easy Tips and Techniques
Common Needle Felting Struggles 8, Banishing the Fuzz
Those stray, loose fibres sticking out from your finished piece can be frustrating. Achieving a clean, professional look is a common goal for needle felters.
Why Fuzz Occurs: Fuzziness is caused by short fibres that haven’t been fully integrated into the felted structure. This can happen due to the type of wool used or the felting technique.
Solutions for Achieving Clean Results:
• Felt Thoroughly: Ensure that all the surface fibres are well-integrated into the core of your piece through consistent and thorough felting.
• Use Finer Needles for Finishing: Switching to a very fine gauge needle for the final stages of felting can help to tuck in those loose surface fibres and create a smoother finish.
• “Surface Felting” Technique: Gently and shallowly felt the surface of your piece with a fine needle, almost like brushing the fibres down.
• Consider Trimming (Carefully!): In some cases, you can carefully trim away very long, stray fibres with small, sharp scissors; I use small curved embroidery scissors for this job. However, be cautious not to cut into the main felted structure.
The Importance of Merino Wool: Merino wool is known for its fine, long fibres, which tend to felt smoothly and produce less fuzz compared to some coarser wool types with shorter fibres. While other wools have their own unique qualities, Merino is often a good choice for achieving a clean finish.
Common Needle Felting Struggles 9, Understanding Wool Types
The world of wool is vast and varied, and understanding the different types can significantly impact your needle felting results.
Different sheep breeds produce wool with varying fibre fineness (micron count), staple length (fibre length), crimp (the waviness of the fibre), and texture. These characteristics influence how the wool felts, its softness, and its suitability for different projects. For example, finer wools like Merino felt smoothly and are great for detailed work, while coarser wools might felt more quickly and be better for structural elements.
For a more in-depth explanation of wool and their types, check out my blog Choosing the Right Type of Wool for Your Needle Felting Projects
To delve deeper into the fascinating world of wool, I highly recommend exploring resources like:
• Online Wool Suppliers’ Websites: Many suppliers provide detailed information about the characteristics of the different wool breeds they offer.
• Needle Felting Forums and Communities: Connect with other felters and learn from their experiences with various wool types, like my own Facebook group, The Needle Felting Community, you can join here and don’t forget to complete all the questions and agree to the group rules.
• Books and Workshops: Dedicated resources on needle felting often include comprehensive sections on wool, like my book ‘Create Beautiful Needle Felted Landscapes’.
And speaking of resources, if you’re looking to add beautiful blended colours to your needle felting projects, don’t forget to grab my free Blending Colours guide! You can find it along with more tips and inspiration on my blog here.
Conclusion
While the initial stages of needle felting can present their share of challenges, remember that every broken needle, every lumpy surface, and every stray fibre is a learning opportunity. By understanding the common pitfalls and implementing these solutions, you’ll be well on your way to creating beautiful and satisfying felted pieces.
Don’t let those “needle felting nightmares” discourage you. Embrace the process, be patient with yourself, and most importantly, keep practicing. The more you felt, the more intuitive it will become, and the smoother your creations will be.
Ready to take your needle felting journey to the next level? My book, ‘Create Beautiful Needle Felted Landscapes,’ is your comprehensive guide to crafting stunning scenic artwork in wool. Suitable for all skill levels, it’s packed with step-by-step instructions, inspiring projects, and all the techniques you need to bring breath-taking landscapes to life.


Click here to purchase your copy of ‘Create Beautiful Needle Felted Landscapes‘ today and unlock a world of woolly possibilities!