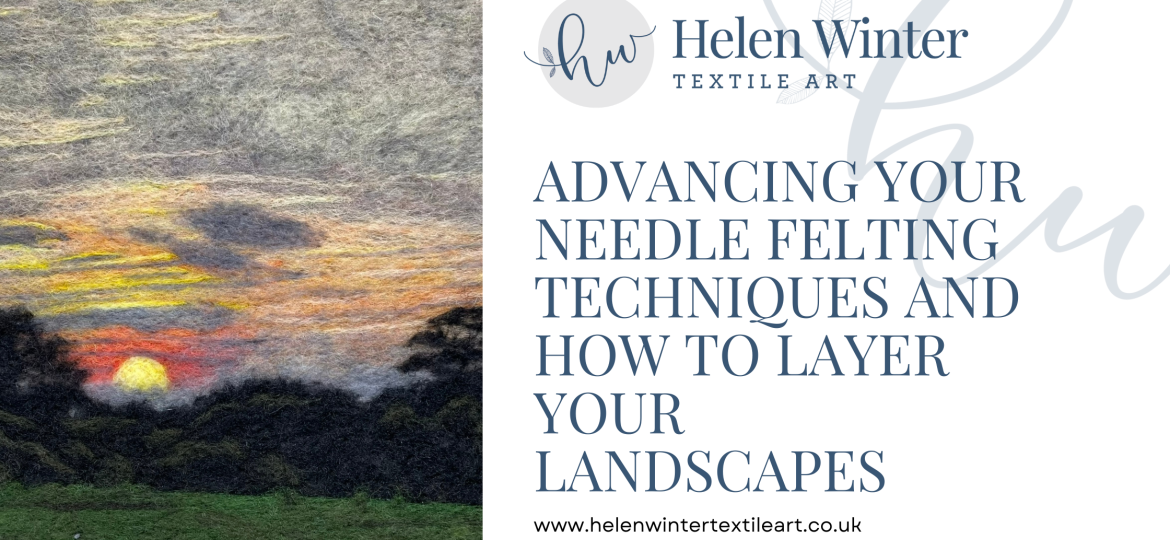
Unlock the secrets to creating breath-taking depth in your felted artwork by mastering advanced needle felting techniques, particularly layering; key to crafting lifelike landscapes. This guide explores how to build stunning 2D scenes with dimension, using a captivating sunset meadow scene as our example project.
But before you get going why not download my FREE guide to Blending and Creating Your Own Wool Colours, perfect for when you can’t find the right colour for your work of art.

Introduction
Creating a needle felted landscape that draws the viewer into its depths involves more than just replicating the colours and shapes of nature. It’s about mastering the art of layering to achieve a sense of depth and perspective, a key element in advanced needle felting techniques. In this blog, we’ll dive into how you can enhance your 2D felting projects by skilfully layering elements to create intricate, lifelike scenes. Let’s get started with a captivating sunset meadow scene as our example project, and explore the various needle felting techniques that make layering so effective.
Understanding Depth through Layering: A Cornerstone of Needle Felting Techniques
The secret to a visually appealing felted landscape lies in its depth. This isn’t just about adding more wool; it’s about strategically placing and manipulating fibres using specific needle felting techniques to create the illusion of distance. Depth is created by arranging elements in layers from background to foreground. The background should feature lighter, softer colours to create a sense of distance.
Think of how atmospheric perspective softens the hues and blurs the details of faraway objects. As you move closer to the foreground, the colours should become darker and more vibrant, which draws the eye and gives the scene life. Mastering this transition through various needle felting techniques is crucial for achieving a realistic three-dimensional effect in your 2D work, especially when envisioning a scene like our sunset meadow scene.
Consider the subtle shifts in colour and value you see in a real landscape. Distant mountains often appear hazy and blue due to the atmospheric particles scattering light. Replicating this effect with your needle felting techniques involves using lighter shades and less defined edges in your background layers, crucial for establishing the backdrop of our sunset meadow scene. This understanding of visual perspective, combined with skilful needle felting techniques, will elevate your landscape creations.
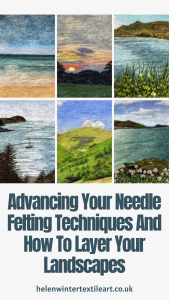
Building Your Background: The Foundation of Your Needle Felted Scene
Start with the sky and distant elements of your sunset meadow scene. For the sky, use light blue or grey shades, subtly blending different tones to suggest clouds or the glow of the sun at dusk or dawn. Consider using wisps of white or pale yellow for clouds, gently needling them onto the base fabric to capture the atmosphere of our sunset meadow scene.
For any distant hills or trees in the background of the sunset meadow scene, use muted greens, blues, or greys, ensuring they are less detailed and lighter in tone than what you will use for the foreground. One of the needle felting techniques you can employ here is very light and even needling to create a soft, almost blurred effect. Avoid harsh lines and focus on smooth transitions between colours, essential for the distant feel of our sunset meadow scene.
Experiment with different wool types for the background. Carded wool slivers blend beautifully and is ideal for creating soft gradients, perfect for the sky in our sunset meadow scene. You can also try adding a touch of silk fibres to the sky for a subtle sheen that mimics the atmosphere of a sunset. You can learn more about what wools to use in my blog Choosing The Right Type of Wool For Your Needle Felting Projects.
Remember, the background sets the stage for your sunset meadow scene, and the needle felting techniques you use here will influence the overall mood and depth of your piece. Think about the direction of your needle strokes; consistent, gentle strokes will create a smoother surface, enhancing the feeling of distance in our sunset meadow scene.
Adding Middle Ground Elements: Bridging the Distance with Needle Felting Techniques
The middle ground acts as a bridge between the distant background and the detailed foreground of your sunset meadow scene. Here, you can introduce groups of trees, or perhaps a gentle slope leading into the meadow. The colours here should be a shade darker and more detailed than the background but not as sharp or vibrant as the elements in the foreground of the sunset meadow scene. This is also a great area to start introducing textures that will be more defined as they approach the viewer in our sunset meadow scene.
When adding trees in the middle ground of our sunset meadow scene, consider using slightly darker greens and hinting at their shapes rather than creating individual leaves. You can use needle felting techniques like repeatedly stabbing a small clump of darker wool to create a more defined silhouette.
For a suggestion of a path or a change in the meadow’s terrain in the middle ground of our sunset meadow scene, use a light brown or beige wool, needling it with slightly more pressure. The needle felting techniques used in the middle ground should create a sense of transition, gradually increasing in detail and colour intensity as you move forward in the sunset meadow scene.
Experiment with layering different shades of the same colour to create subtle variations and depth within the middle ground elements of our sunset meadow scene.
Detailing the Foreground: Bringing Your Needle Felted Landscape to Life
The foreground is where you can let your creativity shine in your sunset meadow scene. Use bright colours and sharp contrasts to make elements pop. Add layers of grass, flowers, or detailed foliage in the foreground of the sunset meadow scene. Incorporate different fibres to give texture and depth, like using coarser wool for bushy areas or silk fibres to mimic dew on the meadow grass. Various needle felting techniques can be employed here to create intricate details in our sunset meadow scene. For instance, you can use a finer gauge needle to sculpt individual flower petals or leaves.
To create textured grass in the foreground of our sunset meadow scene, try attaching small clumps of green and brown wool at different angles, using a barbed needle to tangle the fibres irregularly.
For detailed flowers, you can build up the base with coloured wool and then add layers of petals using different shades and textures to create a realistic effect in our sunset meadow scene. Consider using needle felting techniques to create shadows under foreground elements in the sunset meadow scene, further enhancing the sense of depth. For example, a small layer of darker wool placed beneath a flower can make it appear to cast a shadow, grounding it in the scene.
Example Project: Sunset Meadow Scene – Applying Needle Felting Techniques for Layering
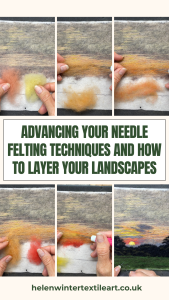
For our sunset meadow scene, begin with a grey, orange, and yellow sky, gently blended using light needle felting techniques. Incorporate wisps of pale pink and purple to capture the hues of a setting sun over the meadow. For the distant trees, use a bluish-grey, needling the wool lightly to create a soft, hazy line along the horizon of our sunset meadow scene.
As you layer towards the middle ground of our sunset meadow scene, introduce a field of muted greens and browns. Use slightly more defined needle felting techniques here, perhaps creating small, indistinct clumps of darker green to suggest distant foliage within the meadow.
In the foreground of our sunset meadow scene, bring the meadow to life with vibrant colours. Layer different shades of green for the grass, using coarser wool for texture. Add pops of colour with small, individually felted flowers in shades of red, yellow, and purple. Use a fine needle to create delicate petals and leaves. Consider adding details like blades of taller grass using thin strands of wool needled vertically within the sunset meadow scene. You can even use needle felting techniques to create subtle variations in the ground, adding small humps and dips with different shades of brown and green in our sunset meadow scene. Remember to use sharper contrasts in the foreground to draw the viewer’s eye into the sunset meadow scene.
If you’re eager to delve even deeper into the art of creating stunning needle felted landscapes like our sunset meadow scene, and master these needle felting techniques, be sure to check out my book, ‘Create Beautiful Needle Felted Landscapes’. It’s packed with detailed tutorials, step-by-step guides, and inspiring projects that will help you unlock your full creative potential.
📖 Create Beautiful Needle Felted Landscapes is now available on Amazon, a fantastic resource for taking your needle felting techniques to the next level and crafting your own beautiful sunset meadow scenes and beyond!
Order your copy today and start your next creative adventure.
Finishing Touches: Adding Personality with Advanced Needle Felting Techniques
No sunset meadow scene is complete without the final touches that give it personality. Maybe it’s a bird silhouetted against the sunset sky, created with a few small pieces of dark wool and precise needle felting techniques, or a small animal nestled in the meadow grass, built up with layers of appropriate colours. Perhaps it’s embroidered seed heads on the spent flowers or small felted stones placed in the foreground of the sunset meadow scene. These details might be small, but they play a crucial role in tying the whole scene together and adding a narrative element to your sunset meadow scene.
Consider the direction of light in your sunset meadow scene. Adding subtle highlights with lighter shades of wool on the edges of foreground elements can enhance the three-dimensional effect. Similarly, adding darker shadows underneath objects will ground them and increase the sense of realism in your sunset meadow scene. Experiment with different needle felting techniques for these finishing touches. For example, you might use a single barbed needle to create fine lines for bird wings or delicate details on the meadow flowers.
Creating layered landscapes like our sunset meadow scene using needle felting techniques is an exciting challenge that allows you to play with colour, texture, and detail. By following these steps and letting your creativity flow, you can create beautiful, depth-filled pieces that captivate and inspire. Remember that practice is key to mastering these needle felting techniques, so don’t be afraid to experiment and explore different approaches to layering and detailing your sunset meadow scenes and other landscape creations. Each project will be a learning experience, bringing you closer to creating truly immersive and breath-taking needle felted art.
Remember to experiment, embrace mistakes as learning opportunities, and above all, enjoy the process of bringing your needle felted landscapes to life and don’t forget to download my FREE Blending and Creating Your Own Wool Colours Here